DIY Kitchen Planner: Your Ultimate Guide to Designing the Perfect Kitchen

Designing your dream kitchen can feel overwhelming, but with a DIY kitchen planner, you can take control of the process and create a space that perfectly suits your needs and style. This article will guide you through the essential steps to plan your kitchen effectively, ensuring functionality and aesthetic appeal.

Why Use a DIY Kitchen Planner?

A DIY kitchen planner allows you to visualize your ideas, consider spatial constraints, and explore design options without committing to expensive renovations upfront. It’s an excellent tool for homeowners looking to refresh their kitchens on a budget, as it helps you prioritize your needs and make informed decisions.

Step-by-Step Guide to Planning Your Kitchen

Step 1: Define Your Kitchen Goals

Start by determining what you want from your kitchen. Consider the following questions:

  • What activities will take place in the kitchen? Cooking, entertaining, dining, etc.
  • How many people typically use the kitchen?
  • What style do you envision? Modern, rustic, minimalist, etc.

Step 2: Measure Your Space

Accurate measurements are crucial for a successful kitchen plan. Use a measuring tape to record the following:

  • Room dimensions: Length, width, and height.
  • Doorways and windows: Measure their size and location.
  • Utilities: Note the positions of plumbing, electrical outlets, and appliances.

Step 3: Create a Layout

With your measurements in hand, it’s time to draft a layout. Here are some popular kitchen layouts to consider:

  • U-Shaped: Maximizes space and offers plenty of counter and storage options.
  • L-Shaped: Creates an open flow, ideal for smaller kitchens.
  • Galley: Efficient for narrow spaces, with counters on both sides.
  • Island: Adds additional prep space and seating, enhancing functionality.

Use graph paper or kitchen design software to sketch your layout, ensuring that the flow of movement between work zones is logical and convenient.

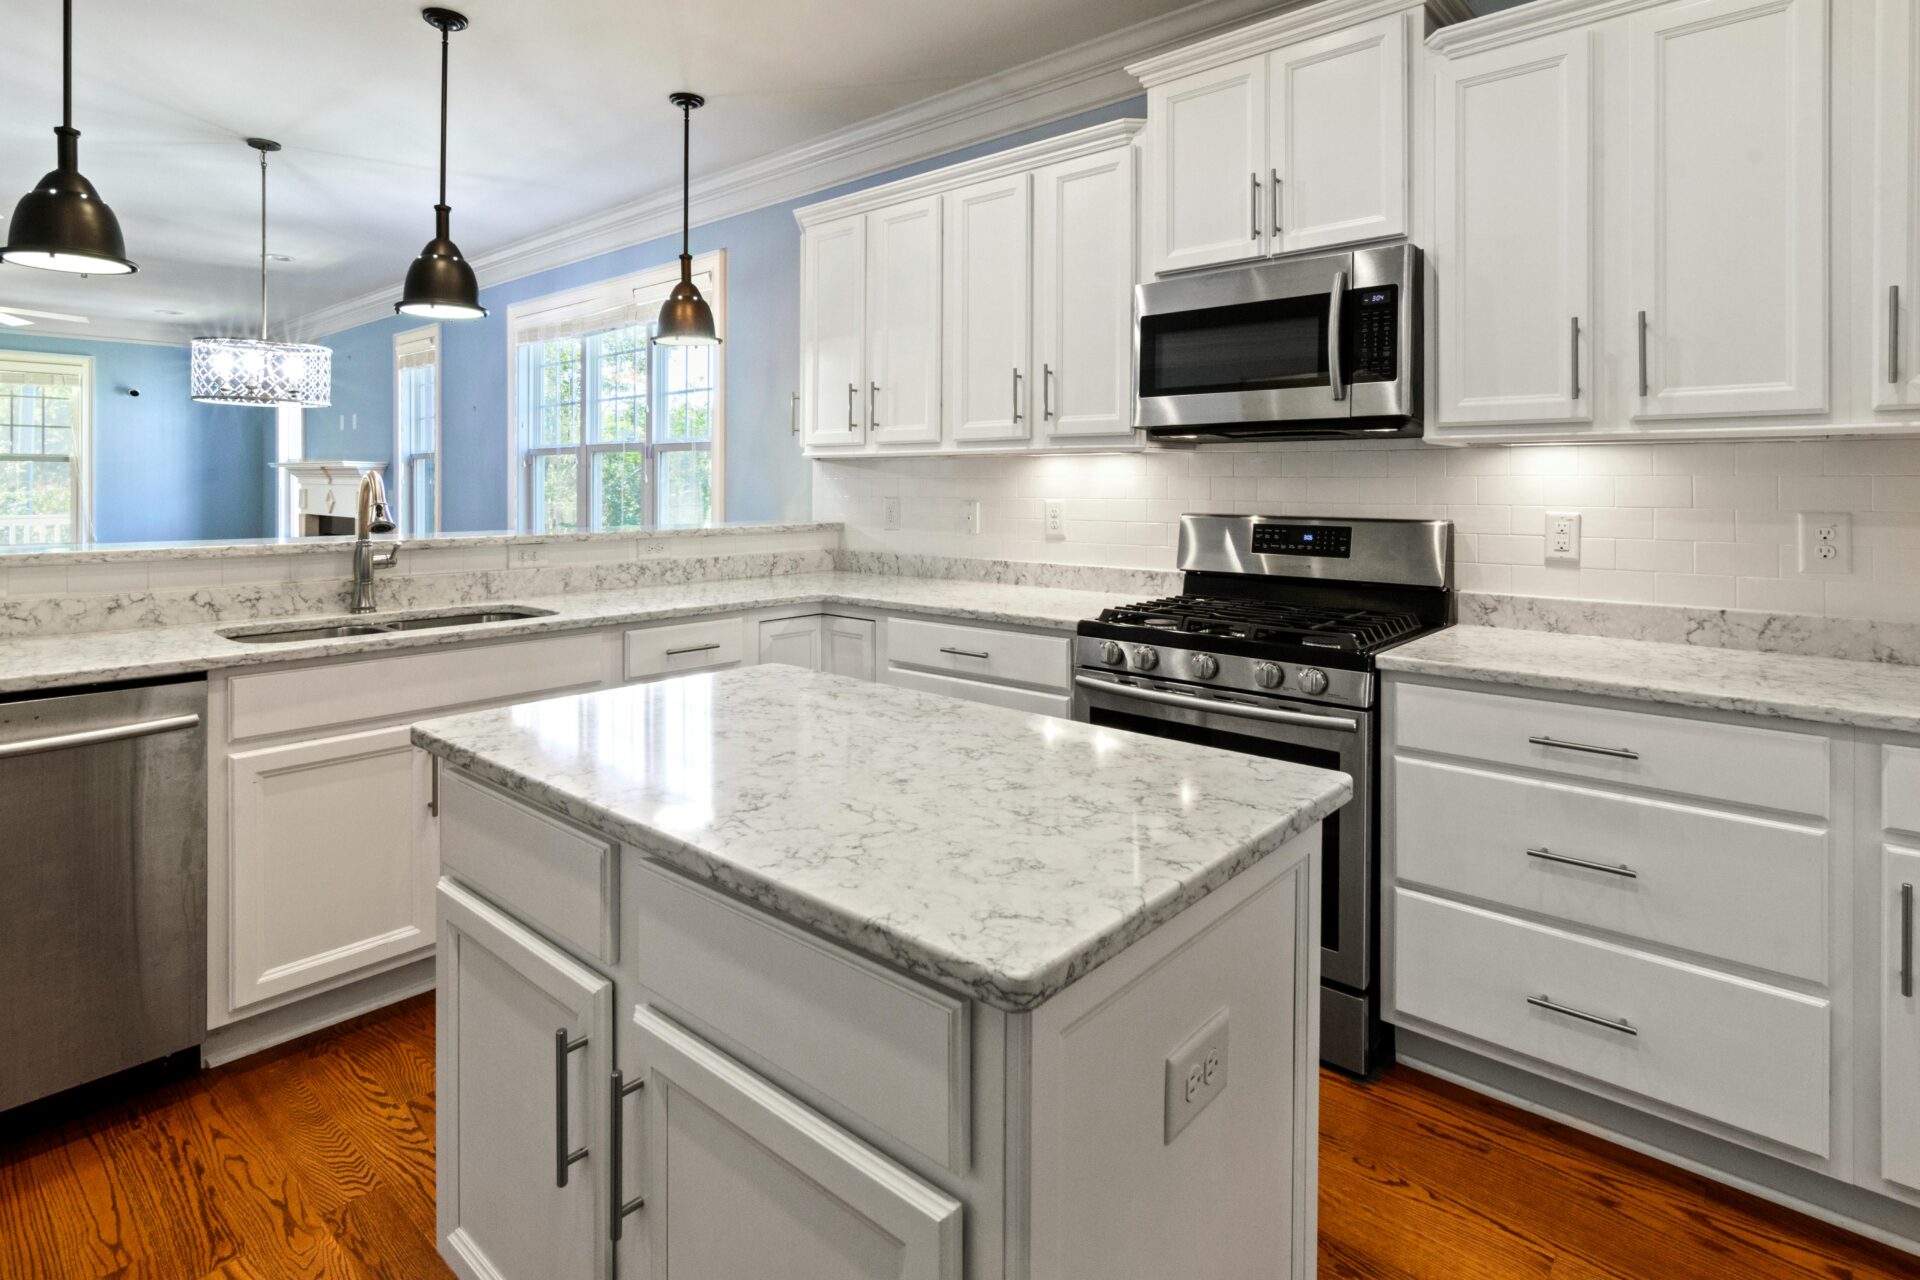
Step 4: Choose Your Style and Materials

Decide on a cohesive style for your kitchen by selecting materials, colors, and finishes. Consider these elements:

  • Cabinets: Style (shaker, flat-panel), material (wood, laminate), and color.
  • Countertops: Options include granite, quartz, wood, and butcher block.
  • Backsplashes: Add texture and color with tiles, glass, or stone.

Step 5: Plan Your Storage Solutions

Effective storage is essential in a kitchen. Consider incorporating:

  • Cabinets: Opt for deep drawers for pots and pans, pull-out shelves, or lazy Susans.
  • Open Shelving: Great for displaying dishes or cookbooks while keeping the kitchen open and airy.
  • Pantries: If space allows, a pantry can be a valuable addition for bulk items.

Step 6: Select Appliances and Fixtures

Choose appliances that suit your cooking style and kitchen size. Consider:

  • Energy Efficiency: Look for Energy Star-rated appliances to save on energy costs.
  • Size and Capacity: Ensure appliances fit your layout and meet your needs.
  • Style: Choose finishes (stainless steel, matte black) that align with your overall design.

Additionally, select fixtures like faucets and sinks that complement your style and offer practicality, such as pull-down sprayers or deep sinks for easy cleaning.

Step 7: Visualize Your Design

Once you have all the elements planned, create a visual representation of your kitchen. Use design software, or even simple drawings, to put together a mood board. Include color swatches, material samples, and photos of similar kitchen styles for inspiration.

Step 8: Budgeting and Implementation

Develop a realistic budget based on your design plan. Break down costs for each element, including materials, labor, and appliances. Prioritize your spending on essential areas, and be prepared to make adjustments if needed.

Creating a DIY kitchen planner is a rewarding process that empowers you to design a space tailored to your lifestyle and taste. By following these steps, you can plan a kitchen that is not only functional but also a joy to cook and gather in.

With a clear plan in place, you’re ready to turn your kitchen dreams into reality!

DIY Eclipse Glasses: How to Make Your Own Safe Viewing Gear

With solar eclipses capturing the attention of skywatchers around the world, it’s essential to have the right equipment for safe viewing. While you can buy specialized eclipse glasses, making your own DIY eclipse glasses can be both fun and budget-friendly. This article will guide you through the process and safety considerations.

Why Use Eclipse Glasses?

During a solar eclipse, the sun is partially obscured by the moon, and looking directly at it can cause serious eye damage. Regular sunglasses do not provide adequate protection. Eclipse glasses are specifically designed to filter out harmful solar radiation, allowing you to safely view the phenomenon. Making your own glasses can be a rewarding project, especially for families and educators.

Materials Needed

To create your DIY eclipse glasses, you’ll need:

  • Black Cardstock or Construction Paper: This will form the frame of your glasses.
  • Solar Viewing Film: This is the most critical component. You can purchase solar filter sheets online or at science supply stores.
  • Scissors: For cutting the paper and film.
  • Tape or Glue: To secure the pieces together.
  • Ruler and Pencil: For measuring and marking.
  • Optional: Decorations like stickers or markers to personalize your glasses.

Step-by-Step Instructions

Step 1: Prepare the Frame

  1. Measure and Cut:
    • Start by cutting two rectangles from the black cardstock, each measuring about 6 inches by 3 inches. These will form the front and back of the glasses.
    • Cut a smaller rectangle (about 2 inches by 1 inch) in the center of each larger rectangle. This will be the opening for your solar viewing film.

Step 2: Add the Solar Viewing Film

  1. Cut the Solar Film:
    • Using the solar viewing film, cut out two pieces slightly larger than the openings you created in the cardstock.
  2. Secure the Film:
    • Place the film over the opening on the front of the cardstock and secure it with tape or glue. Make sure it’s smooth and free of bubbles.
    • Repeat this for the second piece of cardstock.

Step 3: Assemble the Glasses

  1. Join the Two Frames:
    • Align the two cardstock pieces together, ensuring that the solar viewing film is facing outward. Use tape or glue to attach the sides.
  2. Create Temples:
    • Cut two strips of cardstock (about 1 inch by 5 inches) to act as the temples of your glasses. Attach one end of each strip to the outer edges of your frames.

Step 4: Personalize Your Glasses

  • Use stickers, markers, or any other craft supplies to decorate your glasses. This is a fun way to engage kids and make the project more enjoyable!

Step 5: Test Your Glasses

  • Before using your glasses for the actual eclipse, test them by looking at the sun briefly to ensure there are no leaks of light. If you see any light coming through the edges of the solar film, adjust your frame or secure it better.

Safety Tips

  • Never Look Directly at the Sun: Ensure that your glasses are made properly. If they feel flimsy or the solar film is not securely attached, do not use them.
  • Inspect Before Use: Check for any scratches or damage to the solar viewing film.
  • Supervise Children: If children are making these glasses, ensure they are supervised, especially when handling scissors.

Making your own DIY eclipse glasses is a fun and educational project that can help you safely enjoy solar eclipses. By following these simple steps and using the right materials, you can create a personalized pair of glasses that will allow you to experience this celestial event without compromising your eye safety.

With your DIY eclipse glasses in hand, you’re all set to witness the wonders of a solar eclipse while keeping your eyes protected!

Essential Tools for DIY Home Improvement Projects

If you’re diving into the world of DIY home improvement, having the right tools is crucial. Whether you’re planning a minor fix or a major renovation, the correct equipment will save you time, energy, and frustration. In this article, we’ll cover the essential tools every DIYer should have in their toolbox, allowing you to tackle projects with confidence.


1. Measuring Tape

One of the most basic yet essential tools for any DIY project is a measuring tape. Accurate measurements are key to ensuring everything fits correctly, whether you’re hanging a picture, building furniture, or cutting materials. Opt for a sturdy, retractable tape measure at least 25 feet long for maximum versatility.

  • Pro Tip: Invest in a tape with a magnetic end for easy one-person measuring on metallic surfaces.

2. Hammer

A hammer is indispensable for driving nails into wood, assembling frames, or light demolition. A 16-ounce claw hammer is a versatile choice, featuring a flat head on one side for pounding and a claw on the other for removing nails.

  • Pro Tip: For comfort and durability, choose a hammer with a rubber or cushioned grip.

3. Screwdriver Set

Screws are everywhere, so a reliable set of screwdrivers is a must. A mix of flathead and Phillips screwdrivers will cover most needs, but consider a magnetic-tipped screwdriver for added convenience. Better yet, invest in a multi-bit screwdriver for all-in-one functionality.

  • Pro Tip: Get a set with ergonomic handles for ease during long projects.

4. Power Drill

A power drill is one of the most versatile tools in a DIYer’s arsenal. Whether you’re hanging shelves, assembling furniture, or making holes for screws, a cordless power drill will make your life significantly easier. Look for a drill with multiple speeds and an adjustable clutch for control over drilling depth.

  • Pro Tip: Choose a drill with a rechargeable battery for portability and convenience.

5. Level

A level ensures that everything from picture frames to shelves is perfectly straight. A basic spirit level will suffice for most projects, but a laser level provides extra precision, especially for larger projects like mounting cabinets.

  • Pro Tip: Keep a small torpedo level handy for smaller spaces like installing electrical outlets or bathroom fixtures.

6. Utility Knife

A utility knife is invaluable for cutting materials like drywall, carpet, cardboard, or tape. With a sharp blade and retractable design, it’s safe and effective for many tasks. Be sure to regularly replace the blades to ensure clean cuts.

  • Pro Tip: Opt for a folding utility knife for added safety and portability.

7. Adjustable Wrench

An adjustable wrench is essential for tightening or loosening nuts and bolts of varying sizes. Instead of purchasing a set of wrenches, an adjustable model provides flexibility without taking up too much space in your toolbox.

  • Pro Tip: Look for a wrench with a comfortable grip and smooth adjustments.

8. Pliers

From gripping and bending wires to holding objects securely, pliers are a versatile tool. A pair of needle-nose pliers can reach into tight spaces, while larger slip-joint or locking pliers provide added grip and strength.

  • Pro Tip: Pliers with insulated handles are ideal for electrical work, adding an extra layer of protection.

9. Handsaw

A handsaw is a simple yet effective tool for cutting wood, plastic, or even metal pipes. While power saws are faster, a handsaw gives you greater control and is perfect for smaller, more precise jobs.

  • Pro Tip: For versatility, choose a saw with interchangeable blades for different materials.

10. Safety Gear

No DIY project is complete without proper safety gear. Invest in safety goggles to protect your eyes, work gloves to protect your hands, and earplugs or earmuffs if you’re working with loud power tools. A dust mask is also a good idea when working with materials like drywall or paint.

  • Pro Tip: Always keep a first aid kit nearby for quick treatment of any accidental scrapes or cuts.

Having the right tools is essential for the success of any DIY home improvement project. By building your toolkit with these essentials, you’ll be well-prepared to tackle a wide range of projects, from simple fixes to more advanced renovations. Don’t forget that quality tools can last a lifetime, so consider investing in durable, reliable options that will serve you well for years to come.

How to Make a Fishing Rod With Wood: A Step-by-Step Guide

If you’re passionate about fishing or love DIY projects, creating your own fishing rod with wood is a rewarding experience. Whether you’re a beginner or seasoned fisherman, this guide will show you how to make a wooden fishing rod from scratch. Let’s dive into the process with the best materials and techniques for a sturdy, eco-friendly fishing rod.

Materials Needed for DIY Wooden Fishing Rod:

  • A straight piece of wood (such as bamboo or flexible hardwood)
  • Fishing line (monofilament or braided)
  • Fishing hooks
  • Sandpaper or a file
  • Knife or whittling tool
  • Wood varnish or oil (optional for sealing)
  • Strong string or twine for securing

Step 1: Selecting the Right Wood

Choose a straight and flexible piece of wood that is roughly your height or longer. Bamboo is ideal due to its flexibility and strength, but other types of hardwood like willow or ash work well too. Make sure the wood is healthy, without cracks or knots.

  • Tip: Ensure the wood is as straight as possible to avoid warping when using the rod.

Step 2: Preparing the Wood

Once you’ve chosen your wood, remove any bark and leaves. Use your knife or whittling tool to smooth the surface. If the wood is too thick, carve it down to a comfortable diameter for your hand.

  • Pro Tip: Sand the rod with sandpaper to make the surface smooth and remove any splinters. You can also taper the top end of the rod slightly for better flexibility.

Step 3: Creating the Handle

Decide on a section of the wood that will serve as the handle. This is usually the thicker base part of the rod. You can leave the handle natural or wrap it with twine or string to improve grip.

  • SEO Focus: Enhance the comfort of your wooden fishing rod handle by wrapping it with cloth, leather, or cork.

Step 4: Attaching the Fishing Line

At the tip of your rod, carve a small notch or tie a loop of string to attach your fishing line. Secure the line tightly to prevent it from slipping. Run the line down the length of the rod and attach it securely near the handle as well.

  • SEO Keywords: Secure fishing line to the wooden rod using a double knot or wrapping method.

Step 5: Adding the Fishing Hook

Tie a fishing hook to the end of your line. You can use a basic knot like the improved clinch knot to secure the hook. If you’re using a natural bait, make sure the hook is strong and sharp enough to hold onto it.

  • SEO Focus: Attach the fishing hook securely for the best performance with your homemade wooden fishing rod.

Step 6: Finishing and Sealing the Rod (Optional)

For added durability, consider sealing the wood with a varnish or wood oil. This will protect the rod from moisture and increase its lifespan. Allow the varnish to dry thoroughly before use.

  • Pro Tip: Sealing your wooden fishing rod prevents warping and makes it weather-resistant.

Step 7: Testing Your Wooden Fishing Rod

Before heading out to the water, test your rod. Give it a gentle cast to ensure that the line is securely fastened and that the rod has the right amount of flexibility. Adjust the length of the line or tighten the knots as needed.

  • SEO Keywords: Test your DIY fishing rod with wood for balance and flexibility to improve fishing success.

Conclusion

Building your own wooden fishing rod is a fulfilling DIY project that connects you with the traditions of fishing. With just a few basic tools and materials, you can create a functional, environmentally-friendly fishing rod. Remember to take good care of your rod by drying it after each use and storing it in a dry place. Happy fishing!

Exit mobile version